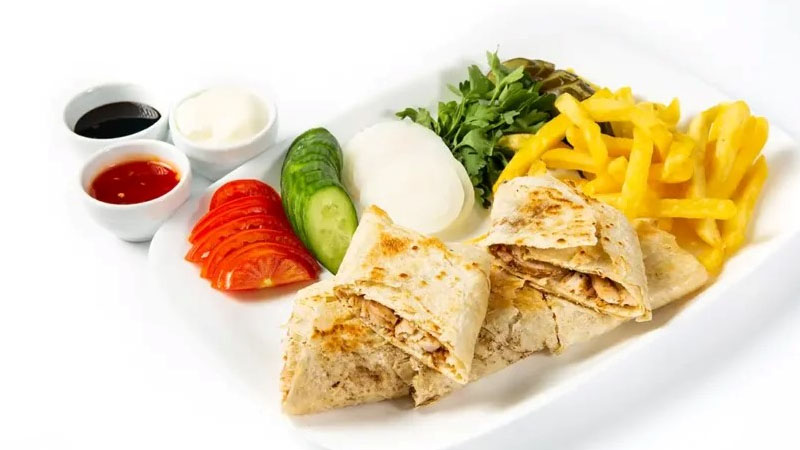
Food photography is more than capturing what’s on a plate — it’s about translating flavor, aroma, and texture into an image that makes viewers crave a bite. A truly delicious food photo evokes emotion. It can make someone hungry, curious, or nostalgic. Behind every mouth-watering picture you see in magazines or restaurant menus, there’s a professional photographer who understands not just photography, but also storytelling, lighting, and the psychology of appetite.
In this article, we’ll uncover the secrets that professional photographers use to make food look irresistibly tasty on camera. Whether you’re a restaurant owner, a food blogger, or a creative photographer, these techniques will help you elevate your food images from ordinary to unforgettable.
Understanding What Makes Food Appealing
Before you pick up the camera, you must understand why certain foods look more tempting than others. Humans are naturally drawn to color, freshness, and texture. A crisp lettuce leaf, a shiny glaze on grilled meat, or the steam rising from a bowl of soup — these small details tell our brain, this food is delicious!
Professional photographers study how light interacts with food. For example, glossy foods like sauces or desserts often need soft, diffused lighting to highlight their sheen, while textured foods like bread or pasta benefit from side lighting that brings out depth and dimension.
Effective Ways to Make Food Look Delicious on Camera
The Power of Lighting
In food photography tips lighting is the soul of food photography. It can turn a dull dish into a masterpiece.
Most professionals prefer natural light for its warmth and authenticity. A north-facing window often gives the most balanced, soft light — perfect for almost any dish. However, when natural light isn’t available, artificial lighting can be equally effective with proper modifiers like diffusers and softboxes.
Tips for perfect food lighting:
- Avoid harsh overhead light; it creates unflattering shadows.
- Use a reflector to bounce light and soften dark areas.
- Backlighting works wonders for transparent foods like drinks or soups — it makes them glow.
- Side lighting adds texture, especially for baked goods or crispy items.
Food Styling: Turning Real Meals into Art
In professional food photography and food photography tips, styling is just as important as photography itself. The best photographers often collaborate with food stylists who arrange ingredients to look natural yet perfect.
Some insider tricks include:
- Use minimal portions: A small plate with neatly arranged food looks cleaner and more elegant than a crowded dish.
- Highlight the hero: Always make one element (like a topping or garnish) stand out.
- Add a sense of freshness: Brush meat with oil, spray vegetables with water, or use a heat gun to keep food looking “just-cooked.”
- Don’t over-style: Too much perfection can make food look fake. Aim for a natural, inviting look.
Professional Vancouver photographer capturing your most meaningful moments with artistic precision and natural light. Book your session today and turn your memories into timeless visual stories.
Composition and Framing
Composition is how you tell your story. The goal is to lead the viewer’s eye naturally toward the most appetizing parts of the dish.
Common techniques:
- Rule of thirds: Position the main subject slightly off-center for a more dynamic image.
- Top-down shots (flat lay): Ideal for multiple dishes or symmetrical compositions.
- 45-degree angle: Mimics the way people naturally view food at a table.
- Close-ups: Show texture — think melted cheese, sugar crystals, or juicy fruit.
Props such as wooden boards, napkins, or cutlery can complement the theme but should never steal attention from the food. Simplicity wins.(Professional photography)
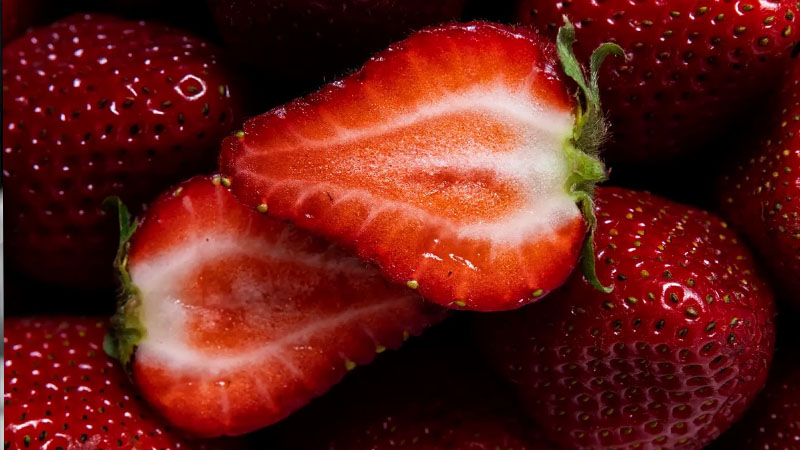
The Role of Color and Texture
Color psychology plays a big role in how delicious food appears. Warm colors — like reds, oranges, and yellows — stimulate appetite, while cool colors (like blue) tend to suppress it. That’s why most food brands avoid blue plates or backgrounds.
Textures also tell a visual story: a flaky crust, a creamy sauce, or a bubbly drink makes the viewer feel the taste before even eating. Professional photographers often combine contrasting textures (crispy with smooth, shiny with matte) to add visual interest.
Post-Production: Enhancing, Not Faking
Editing food photography is like seasoning a dish — a little enhancement brings out the best flavors, but too much can ruin the balance. The goal isn’t to make the food look fake; it’s to make the viewer taste it with their eyes. In professional workflows, post-production is where images gain their final polish, warmth, and storytelling tone.
Photographers use programs like Adobe Lightroom, Photoshop, and Capture One to fine-tune light, color, and detail. The process focuses on realism — preserving the natural texture and vibrancy of the food while eliminating distractions.
Below is a table showing the most common post-production techniques used by professional food photographers and their practical purposes:
| Editing Technique | Purpose / Effect on Image | Pro Tips from Professionals |
| White Balance Adjustment | Ensures true color of food (no yellow or blue cast). | Always use a gray card when shooting; correct color temperature first. |
| Exposure & Contrast | Makes the food pop and appear fresh. | Slightly increase contrast to enhance crispness, but avoid losing shadow detail. |
| Clarity & Texture | Brings out surface details (crusts, seeds, frosting). | Use subtly on desserts or shiny foods — too much texture can look harsh. |
| Vibrance & Saturation | Adds life to the colors. | Adjust vibrance instead of saturation for a more natural look. |
| Highlights & Shadows | Balances brightness across the dish. | Lift shadows gently; don’t flatten the image. |
| Selective Color Editing | Enhances specific tones (greens, reds, yellows). | Perfect for salads or drinks — make fresh elements glow. |
| Sharpening | Defines edges and fine details. | Apply locally (not globally) to keep soft areas like cream natural. |
| Spot Removal / Cleanup | Removes crumbs, fingerprints, or unwanted reflections. | Keep imperfections that feel real; don’t over-clean the plate. |
| Dodging & Burning | Adds depth and directs the viewer’s eye. | Use light to sculpt highlights and create appetizing focus zones. |
Going Deeper: Editing Philosophy
The best post-production mirrors the natural qualities of the dish. For instance:
- Warm meals (like soups or pasta) benefit from slightly golden tones that evoke coziness.
- Cold beverages or desserts shine with crisp whites and subtle blue undertones that suggest freshness.
- Baked goods look tastiest with deep, rich shadows emphasizing texture and warmth.
Consistency is also vital. Professional photographers often create custom presets or LUTs to maintain a cohesive mood across restaurant menus, social media campaigns, or brand portfolios.
Also you can see: Small Business Photography: How to Build Trust Through Images
Finally, the editing process should always respect authenticity. Over-polished food loses emotional connection — a few crumbs or imperfect textures often make a dish look real, approachable, and delicious.
Common Mistakes to Avoid
Even seasoned photographers make errors when shooting food. The most common ones include:
- Overexposure, which washes out textures and colors.
- Using flash directly on food (creates glare).
- Overcrowding the frame with unnecessary props.
- Ignoring the freshness factor — wilted herbs or dry sauces kill the appetite.
Always prepare backup ingredients and be ready to refresh your setup between shots.
Storytelling Through Food Photography
Every food photo should tell a story — whether it’s a cozy breakfast at home, a luxurious fine-dining moment, or a rustic kitchen vibe. Great photographers use composition, color, and atmosphere to build emotion around the dish.
Think beyond the plate: include hands pouring coffee, crumbs scattered on a table, or soft light entering from a window. These elements create authenticity and warmth — the feeling that there’s life happening around the food.
Food and Beverage Photography in Vancouver
Vancouver’s food scene is a paradise for photographers. From its vibrant seafood markets to artisan cafés and high-end restaurants, the city offers endless opportunities to capture culinary beauty. The natural light from the Pacific Northwest — often diffused by gentle clouds — creates a perfect setting for food photography, especially for outdoor shoots and window-lit cafés.
Many local photographers collaborate with chefs, breweries, and farm-to-table brands to highlight Vancouver’s unique blend of global cuisine and west coast freshness. Whether you’re photographing sushi, organic brunch, or local craft beverages, Vancouver’s culinary diversity ensures every frame tells a rich, flavorful story.
Also see : How to Become a Commercial Photographer
Mandana Rostami: A Taste Artist Behind the Lens
Among the rising names in professional food photography, Mandana Rostami stands out for her artistic approach and attention to emotional detail. With years of experience capturing not just food but feeling, she believes that every dish has a soul — and her mission is to reveal it through light and composition.
Her signature style blends natural textures, soft lighting, and storytelling aesthetics that make each frame feel alive. Mandana often collaborates with restaurants, cafés, and chefs who want their dishes to express more than just taste — they want to evoke memory, emotion, and passion. Her work inspires both photographers and culinary professionals to see food not as a product, but as a visual poem.
Essential Gear for Food Photographers
While creativity matters most, having the right tools makes the job smoother. A typical food photographer’s kit includes:
- Camera: A DSLR or mirrorless with manual control (Canon R5, Sony A7R series).
- Lenses: A 50mm prime for natural perspective, 100mm macro for details.
- Tripod: For sharp images and consistent framing.
- Reflectors and diffusers: To control light precisely.
- Tethering cable or wireless setup: To preview shots live on a laptop.
Good equipment supports your vision but doesn’t replace creativity — remember, the best tool is the eye behind the camera.Also Industrial Photography
Working with Clients: Communication is Key
Professional photographers know that success in commercial food photography depends on understanding the client’s goals. Is the shoot for a fine dining restaurant, a coffee brand, or a cookbook? Each requires a different visual tone.
Discuss mood boards, reference photos, and target audience in advance. A collaborative process ensures the final images match the brand’s personality — whether it’s elegant, cozy, luxurious, or bold.
Final Thoughts: Making People Taste with Their Eyes
To make food look delicious on camera, you need more than technical skill — you need empathy for taste. The most powerful food photographs are created when the photographer connects with the story behind the dish.
Every plate tells a journey — of farmers, chefs, and traditions. Through careful lighting, composition, and emotional storytelling, you can make viewers feel the flavor long before they take a bite.
Food photography is an art of transformation: turning light into flavor, color into emotion, and texture into memory. And that’s what separates a picture of food from a portrait of taste.
2 Responses
Hello Mandana,
I recently opened a new restaurant, and I’m looking for a professional photographer who can help with the following:
Food and menu photography
Designing and preparing the menu
Interior and kitchen photography
Exterior and restaurant environment photography and videography
I really like your work and your style. Could you please let me know if you provide these services and how we can discuss details and pricing?
Thank you so much,
Michel Smite
Restaurant Owner
Hello Michel
Yes, of course! We provide all the services you mentioned. You can take a look at some of our sample works in food photography. Our team will contact you soon to discuss the details.